BIQU MicroProbe V2.0 Bed Calibration Sensor
| Category: | Pad, filament sensors |
|---|---|
| The item has been sold out… | |


BIQU MicroProbe V2.0 is used for precise calibration of your print bed.
Compared to BL Touch and 3D touch, it is significantly smaller, lighter, and more accurate.
The difference compared to V1.0 is very small. The dimensions have been slightly adjusted and the sensor logic has been modified, as some boards could not detect probe commands.

Main advantages:
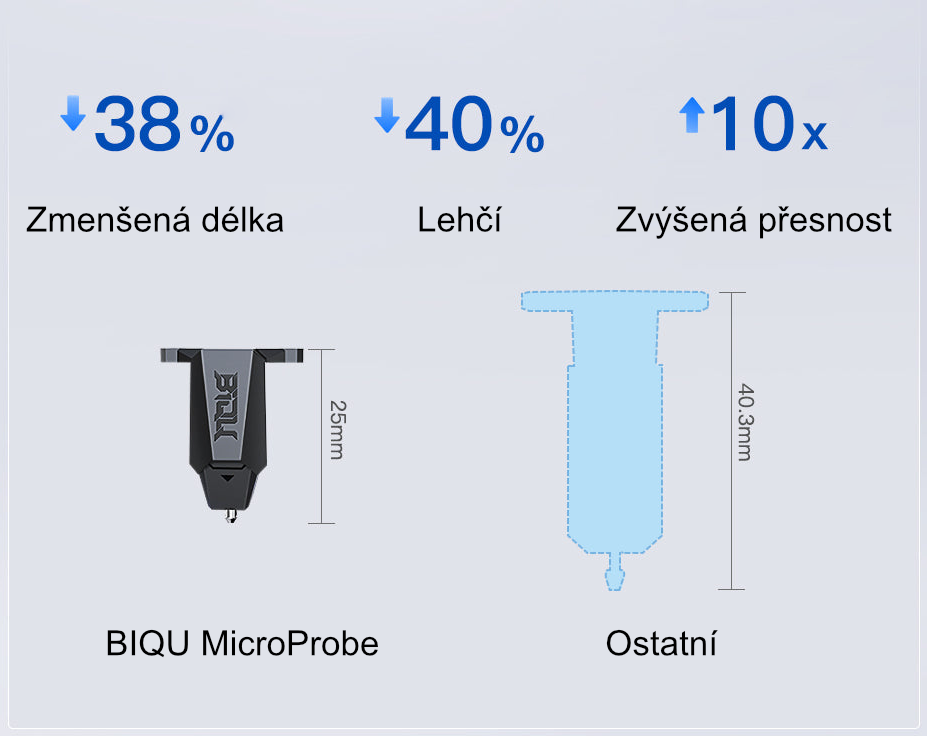
Smaller, lighter, more accurate
The name MicroProbe is truly fitting here. Minimal dimensions, yet better properties compared to its larger siblings.
This sensor truly deserves the name Micro.
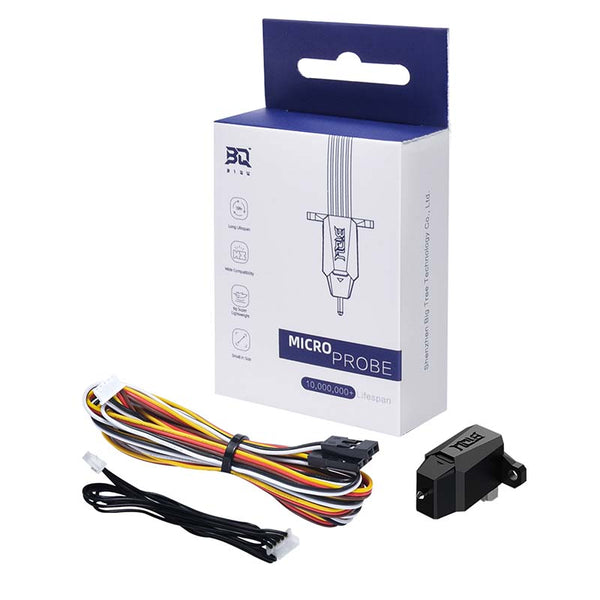
Packaging
The set includes the sensor itself, a 15 cm cable for the sensor, and a 100 cm extension cable.
The package does not include a mounting bracket. And unfortunately, it doesn't include a duck either :-).
Product Information:
BIQU MicroProbe is the first sensor manufactured directly by BIQU. We first encountered it on the BIQU HURACAN printer. Thanks to the sensor, manual bed leveling is not necessary, as the sensor detects the bed's curvature with a few touches. Based on the detected values, the system adjusts the print to follow the bed's curvature. The resulting print will be identical to a print performed on a perfectly horizontal bed.The number of touch points is at least 9. 16 or 25 are recommended for more accurate measurement.
Parameters:
Weight: 6 g
Voltage: 5 V
Current - standby mode: 3 mA
Current - maximum: 2A (600 mA for V1.0)
Working temperature: ≤ 60°C
Accuracy: 0.001 mm standard deviation at 24°C, 0.003 mm standard deviation at 60°C
Lifespan: 10 million cycles
Assembly andConnection:
If you are already using BL/CR/3Dtouch on your printer, you cannot use the same holder because the MicroProbe is 15.3mm shorter. You can only use the existing cable, the pins are arranged in the same way. It connects to the board via the Z-Probe connector. The firmware for the board CANNOT be the same as the one you have for BL/CR/3Dtouch, but each user must create it themselves. What needs to be set in the firmware can be found in the manual on the BTT github, both for Marlin and for Klipper.
>> MANUFACTURER'S INSTRUCTIONS <<
The product requires professional assembly and is not a stand-alone functional unit.
The product may require modification and re-flashing of the printer firmware, which the user does at their own risk.

